Sharing REDHAWK Projects With Others
The REDHAWK IDE provides a set of tools that allow for the collaborative development of REDHAWK capabilities. Projects can be exported or imported from the IDE or can be shared via a source code version-control system. The base REDHAWK IDE installation includes support for CVS, and Git and can easily be extended to include support for other systems, such as Mercurial.
REDHAWK Project Metadata Files
When sharing projects, it is important to include all of the source code, REDHAWK XML, and project metadata files. The project metadata files contain settings and preferences that allow the REDHAWK IDE to properly generate, build, and analyze the project.
Project metadata files are typically hidden files (i.e., they start with a ’.’ ) and usually do not appear within the Project Explorer view. Furthermore, many project views also display or hide additional non-file content.
To view all of the files using the Navigator view:
Select Window > Show View > Other….
The Show View dialog is displayed:
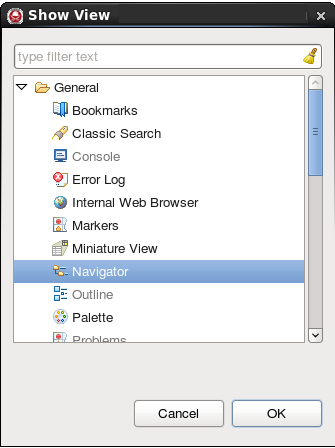
Show View Dialog
Expand General and select Navigator.
Click OK.
The Navigator view is displayed:
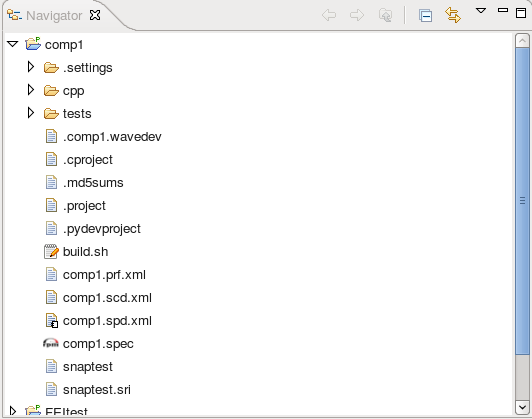
Navigator View
The set of metadata files found in a project varies depending on the type of project. At a minimum, all projects contain a .project file.
Common metadata files are:
.projectfile - Defines the basic Eclipse project settings.libraryfile - Defines the Interface Description Language (IDL) search path for the project.PROJECTNAME.wavedevfile - Defines REDHAWK specific settings for the project related to code generation..cprojectfile - Defines settings related to the C/C++ Development Tools.pydevprojectfile - Defines settings related to the Python Development Tools.classpathfile - Defines settings related to the Java Development Tools
When sharing projects, be sure to include all project metadata files. When in doubt, include all files found in the project.
Exporting Projects as Source Code Archives
The quickest way to share projects is to export them as an archive file. A single archive may contain one or more projects of varying types. This allows easy distribution of an archive that includes all of the relevant components, libraries, and REDHAWK XML files that another developer would require.
To export a project as an archive:
Select File > Export….
The Export Select dialog is displayed:
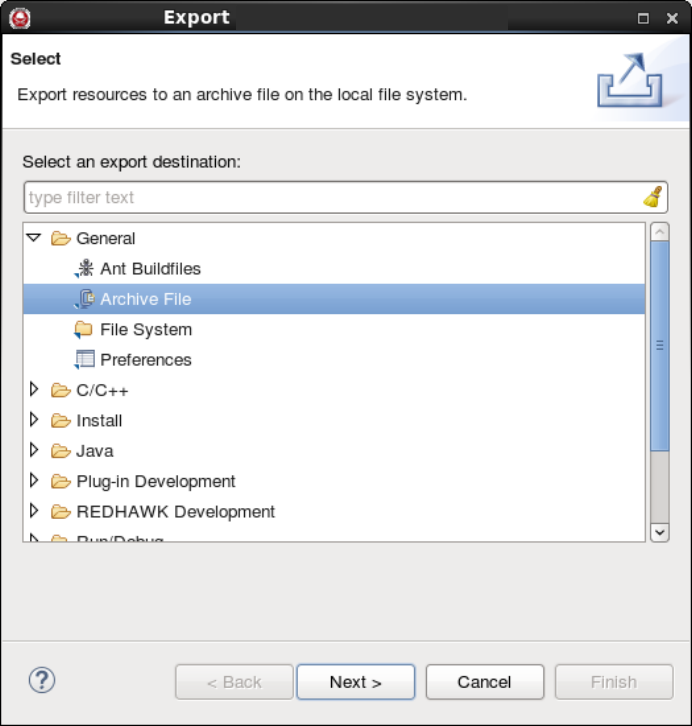
Export Select Dialog
Expand General and select Archive File
Click Next.
The Export Archive file dialog is displayed:
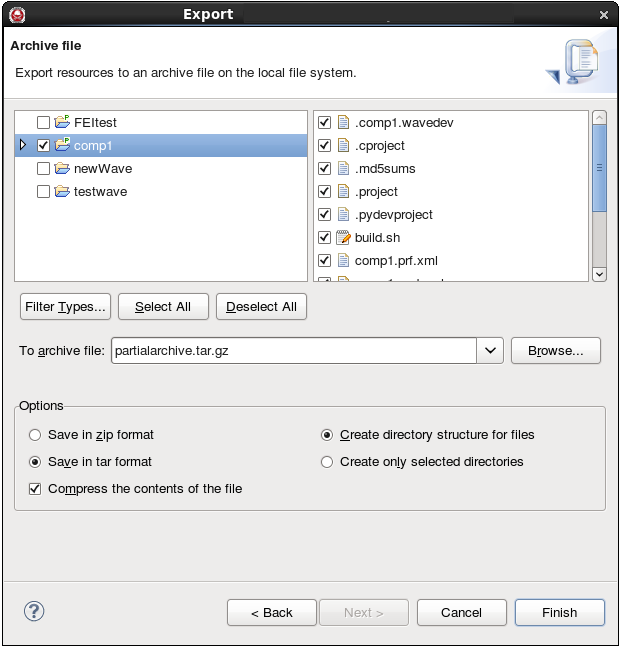
Export Archive File Dialog
Select the projects or files to include in the archive.
When selecting a project, all files within the project are included in the archive by default. To reduce the set of files being exported, click Filter Types… and select the desired file extensions to be included in the archive.
Specify the output file in To archive file.
Click Finish.
The archive file is created.
Importing Existing Projects
Existing projects can be imported into a REDHAWK IDE workspace.
To import existing projects:
Select File > Import….
The Import Select dialog is displayed:

Import Select Dialog
Expand General and select Existing Projects into Workspace.
Click Next.
The Import Projects dialog is displayed:
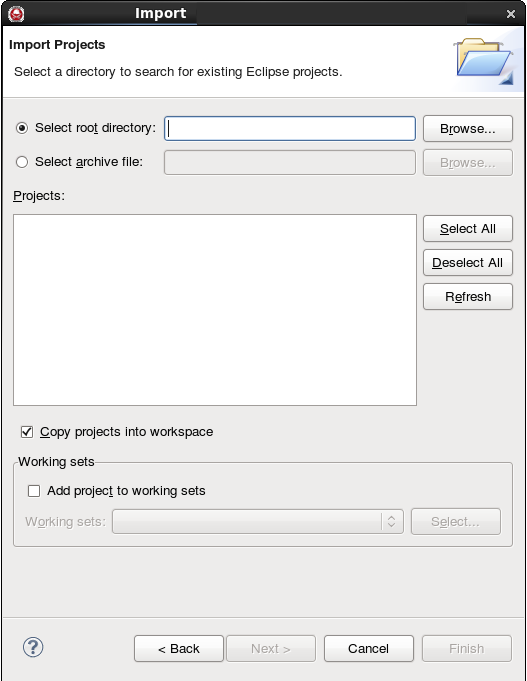
Import Projects Dialog
Select the location of the projects to import.
- If the existing projects are stored as a file system, select Select root directory, click Browse… and navigate to the directory containing the projects.
- If the existing projects are stored in an archive file, select Select archive file, click Browse… and navigate to the archive file containing the projects.
Select one or more projects to import.
Click Finish.
The project is imported into the current workspace.
A common error is to attempt to import projects by choosing General > Archive File instead of General > Existing Projects into Workspace.
When importing projects from a directory, you may choose to keep the project’s source code in its original location by deselecting Copy projects into workspace. (This may overwrite existing project files.) It is recommended to copy the project into the workspace whenever possible.
Importing Incomplete Projects
Users may forget to include the hidden files when exporting projects. As long as the Software Package Descriptor (SPD) file and code are included in the archive, the project can be imported into a REDHAWK IDE workspace using the Redhawk Import Wizard. This wizard makes a series of assumptions for the project folder layout and format based on the content of the SPD file and dynamically generates the missing project files.
To import incomplete projects:
Select File > Import….
The Import Select dialog is displayed:

Import Select Dialog
Expand REDHAWK Development and select Redhawk Import Wizard.
Click Next.
The Import Projects dialog is displayed:
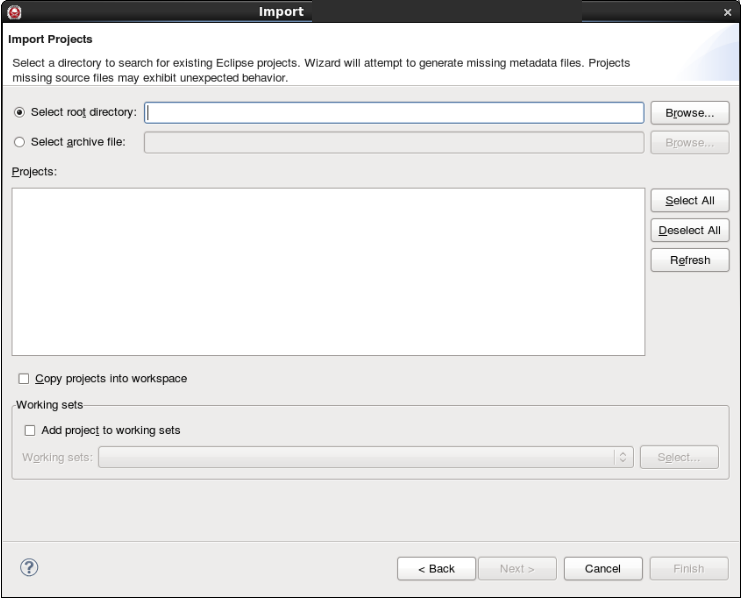
Import Projects Dialog
Select the location of the projects to import.
- If the existing projects are stored as a file system, select Select root directory, click Browse… and navigate to the directory containing the projects.
- If the existing projects are stored in an archive file, select Select archive file, click Browse… and navigate to the archive file containing the projects.
Select one or more projects to import.
Click Finish.
The project is imported into the current workspace.
To create the missing metadata files, open the SPD file and click Generate All Implementations.
When importing projects from a directory, you may choose to keep the project’s source code in its original location by deselecting Copy projects into workspace. (This may overwrite existing project files.) It is recommended to copy the project into the workspace whenever possible.
Collaborative REDHAWK Development Using a Version Control System
REDHAWK projects can be shared by multiple developers by using a version-control system such as CVS or Git. When sharing projects via a version-control system, it is important to commit all of the project metadata files.
All version-control system integration within the Eclipse IDE is performed by the Team Capabilities. Because the REDHAWK IDE is built upon the Eclipse platform, one can easily install plug-ins that provide support for additional version-control systems. Details for installing these plug-ins can be found on the associated project web pages.
The details for sharing and importing projects differs for each type of version-control system. Documentation for most tools can be found on the Internet or through the built-in Eclipse help system.
To view full documentation:
Select Help > Help Contents.
Choose the appropriate topic:
- Workbench User Guide > Getting Started > Team CVS tutorial.
- Subversive User Guide.
- The appropriate topic for the specific tool being used.
To share a project:
Right-click the project to share and select Team > Share Project….
The Share Project dialog is displayed:
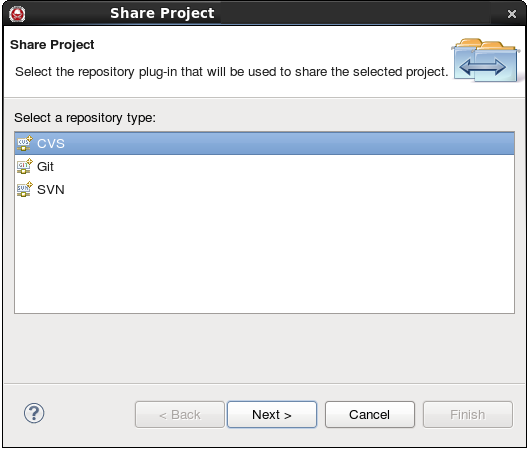
Share Project Dialog
Choose the appropriate version-control system (e.g. CVS, Git, etc.)
Follow the steps for sharing the project as described in the relevant documentation.
To import a project:
- Select File > Import.
- Expand the desired item (e.g. CVS, Git, etc.) and click Next.
- Follow the steps for importing the project as described in the relevant documentation.
Once a project is being tracked by the Eclipse team system, many additional capabilities are exposed. For example, files that have been modified are decorated to indicate their current status. This provides an “at-a-glance” view of which files need to be committed or reverted.
Other useful features include:
- Quick review of outgoing changes using the Eclipse “diff” viewer.
- Commit changes from within the IDE.
- Update the projects with changes from the source repository.
- Review the logs and commit history for files in the project.
- Create and merge branches.
Managing Projects Outside of the Eclipse Workspace
An alternate approach is to use the version-control system’s native tools and then import the project directories into the REDHAWK IDE. It is important to ensure that projects DO NOT select Copy projects into workspace when using the method.
Exporting Projects as a Deployable REDHAWK Project
To install a REDHAWK project into the Target SDR or share a “ready to run” package, it is necessary to export the project as a Deployable REDHAWK project. Unlike a source code export, a deployable export only includes the REDHAWK XML files and the files identified in the SoftPkg implementation.
If the SoftPkg implementation references a directory, the export includes all files within the directory.
To export a project as a deployable REDHAWK project:
Select File > Export….
The Export Select dialog is displayed:
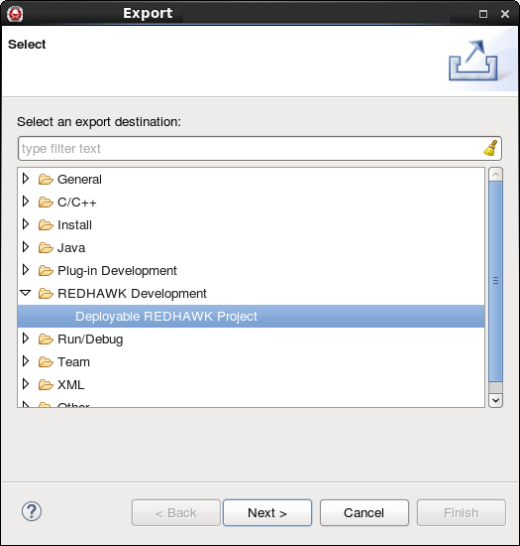
Export Select Dialog
Expand REDHAWK Development and select Deployable REDHAWK Project.
Click Next.
The Deployable REDHAWK Project dialog is displayed:
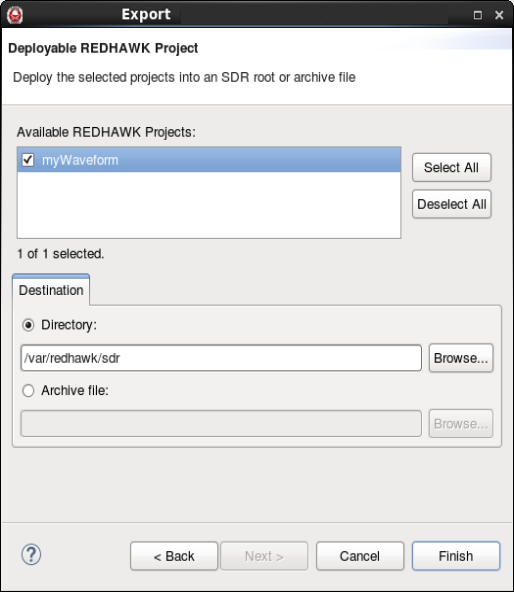
Deployable REDHAWK Project Dialog
Select the projects to export.
Select the export destination.
- To export to a directory, select Directory, click Browse… and navigate to the directory.
- To export to an archive file, select Archive file, click Browse… and navigate to the archive (zip) file.
Click Finish.
The project has been exported as a deployable REDHAWK project.
Deployable REDHAWK project archives are intended to provide a stop-gap capability to easily install a project into a REDHAWK Target SDR. In general, it is recommended to use the rpm format instead of a deployable REDHAWK project archive.