Creating a Component Project
In this section, an overview of the structure of a component is presented.
Component Wizard
In the REDHAWK IDE, development of new components, devices, or other artifacts in a REDHAWK environment is contained within an Eclipse project. Each REDHAWK-specific artifact is associated with a wizard that leads the developer through the steps necessary to create a project, which supports the minimum required pieces for proper functioning. For components, the default project settings allow the developer to choose between Python, C++, and Java as the development language. To start the IDE and begin creating a component, run the eclipse binary in the IDE installation directory. Then, select File > New > REDHAWK Component Project.
Component Descriptors
A REDHAWK component is described through three XML files, a Software Package Descriptor (SPD) file (<component>.spd.xml), a Properties File (PRF) file (<component>.prf.xml), and a Software Component Descriptor (SCD) file (<component>.scd.xml). The role of the SPD is to describe all the files that are associated with the component: the PRF and SCD files, all binaries, and associated data files. The PRF file contains a description of all the properties that this component supports. The SCD file contains a description of the component inputs/outputs.
The REDHAWK IDE uses an internal model to maintain the state of the component design. This model is a Java representation of the three XML files described above as well as project-specific information (like the development language). The main screen on the component development perspective contains several tabs. Some of these tabs are for panels and some are for XML files. The different panels available for component design are used to change this model; the model is automatically and continuously mapped to the three XML files. This awareness is symmetrical; much like changes in the panels result in changes in the XML files, changes in the XML files result in automatic updates to the panels.
Ports
Data flow into and out of components is accomplished through the use of ports. Ports are described as being either a provides (input) or uses (output) port. This naming convention is often viewed as counter-intuitive, so an explanation is in order. Ports are RPC interfaces to a component. An input port, therefore, provides functionality that can be used by an output port.
REDHAWK contains a variety of standardized interfaces that facilitate interoperability. These interfaces are implemented by ports. When a port is selected in the component generation wizard in the REDHAWK IDE, code to implement these interfaces is automatically generated.
Properties
Properties provide a way to adjust a component’s configuration or settings while also allowing external entities (e.g., programs, UIs, or status scripts) to inspect the state of the component. Properties are the primary means for component configuration.
There are four types of properties: simple, simple sequence, struct, and struct sequence. A simple property has a single value of a particular primitive type (e.g., short or float). A simple sequence is an array of values of a the same primitive type. A struct property is a structure that contains a set of named simple and/or simple sequence properties. A struct sequence is an array of instances of the same struct type.
Properties also have a kind that expresses the role in which the property is used. The kind can be property, allocation, or message. The property kind is used for configuration and status. The allocation kind is used to express requirements on capabilities provided by devices. The message kind is used only with struct properties to send event messages within REDHAWK.
Logging
Components, irrespective of which language is used for their implementation, contain access to loggers. Logging in C++, Python, and Java utilizes log4j, a powerful logging framework maintained by the Apache Software Foundation.
Generating Code for Components
After a component project is created and appropriate details for the component are entered in the SPD editor, the IDE can generate skeleton code for the project. To begin the code generation process, click the Generate All Implementations button located in the top-right of the Overview panel of the SPD editor.
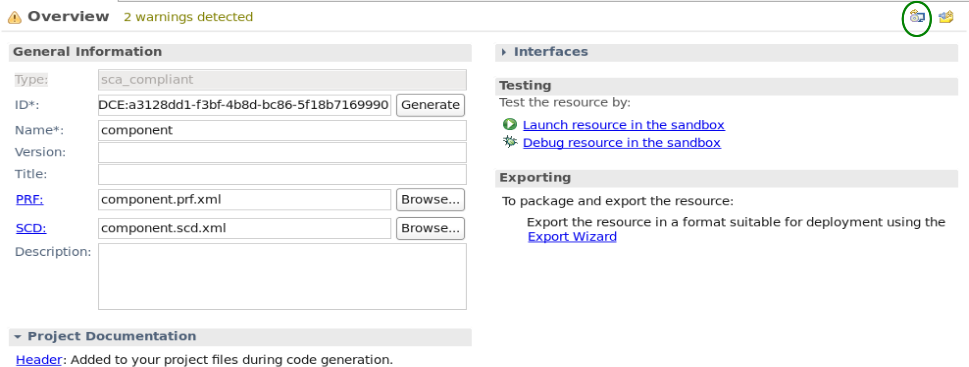
Generate All Implementations Button
When you click the Generate All Implementations button, the IDE:
- Determines if your project contains any deprecated features from older versions of REDHAWK and prompts you to upgrade them.
- Displays the files that will be generated and enables you to select/deselect files.
- Generates code files and applies any headers specified in the project documentation.
- Updates the SPD file with the version of REDHAWK used to generate code.
Code generation is not exhaustive, and custom port types may not compile.
Installing Components
After a component is compiled, it must be installed in the staging area ($SDRROOT/dom/components). To install a component from the Project Explorer view, drag the top-level component project onto the Target SDR section of the REDHAWK Explorer view. See Deploying Projects to the SDRROOT for additional information.